The Allure of Black Gold Halloween Wax Seals: A Complete Guide
When the autumn air turns crisp and the first hints of orange and crimson appear, Halloween enthusiasts begin planning their celebrations. Among the many ways to add an air of mystery and sophistication to Halloween correspondence, decorations, and party favors, black gold Halloween wax seals have emerged as a striking and memorable choice. These elegant seals combine the darkness of Halloween with the opulence of gold, creating a visual statement that is both eerie and refined.
Whether you are sending out invitations for a haunted house party, wrapping gifts for a Halloween gathering, or simply adding a touch of gothic charm to your autumn decor, understanding the purpose and craft of black gold Halloween wax seals can elevate your creative projects. This guide explores everything you need to know—from their historical roots to modern applications—so you can use them with confidence and flair.
What Are Black Gold Halloween Wax Seals?
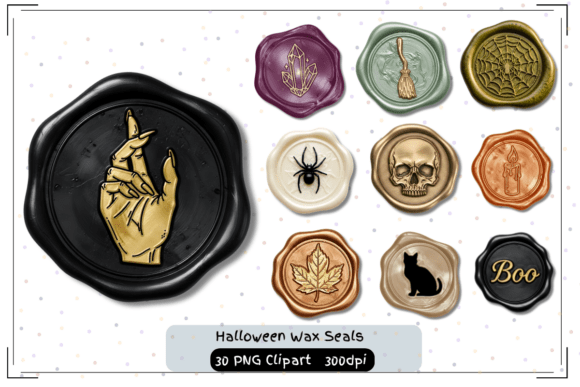
At their simplest, wax seals are impressions made by stamping a design into melted wax. When the wax hardens, it leaves a raised emblem that can be used to secure envelopes, decorate stationery, or embellish keepsakes. The black gold variation uses black wax—sometimes with gold flecks, gold leaf, or a metallic gold finish—paired with a stamp design that evokes Halloween themes. Common motifs include bats, spiders, skulls, pumpkins, crescent moons, and gothic lettering.
The combination of black and gold is intentional: black represents the mystery, darkness, and thrill of Halloween, while gold adds a layer of luxury, permanence, and timelessness. This pairing makes the seals suitable not only for spooky events but also for upscale celebrations, themed weddings, and even corporate Halloween parties where a touch of class is desired.
The History and Revival of Wax Seals
Wax seals have been used for centuries as a means of authentication and security. Before envelopes as we know them existed, letters were folded and sealed with wax imprinted with a personal crest or family emblem. Breaking a seal was a sign that a message had been tampered with, and the design itself served as a signature of the sender.
In modern times, wax seals have experienced a revival in the world of paper crafting, calligraphy, and event planning. They are no longer just functional tools—they are decorative accents that convey care, tradition, and personality. For Halloween, the dramatic nature of wax seals fits perfectly with the season's love for the old-fashioned, the mysterious, and the handmade. Black gold Halloween wax seals, in particular, capture this spirit by blending antique charm with a contemporary color palette.
Why Black and Gold for Halloween?
Halloween colors have traditionally been orange and black, but in recent years, a broader spectrum has gained popularity. Black and gold together offer a sophisticated alternative that still honors the holiday's core aesthetic. Here is why this combination works so well:
- Contrast and visibility: Gold stands out vividly against a black background, making the seal design easy to read and admire even from a distance.
- Versatility: Black gold seals complement both dark and light envelopes, whether you choose deep purple, charcoal, cream, or blood-red paper.
- Theme alignment: Gold evokes candlelight, treasure, and the gilded details of Victorian gothic style, all of which align with Halloween's fascination with the ornate and the macabre.
- Perceived value: Gold conveys importance and quality. Using a black gold wax seal makes your invitation or gift feel special and carefully prepared.
Choosing the Right Words for Halloween Wax Seals
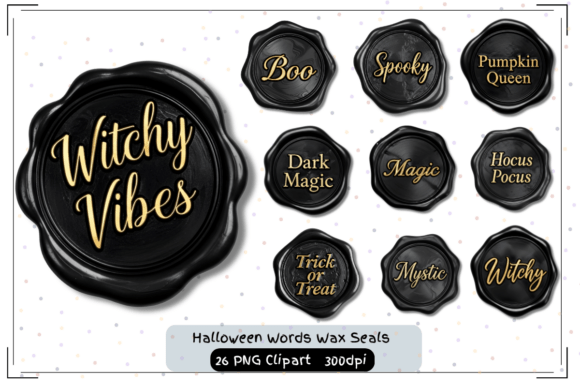
The phrase Black Gold Halloween Words Wax Seals hints at one of the most enjoyable parts of the process: selecting the words or initials to stamp. While some seals feature images, many crafters prefer text-based stamps that include names, dates, or short sayings. Here are some popular word choices for Halloween wax seals:
- Initials or monograms: A single letter or intertwined initials in a gothic font add a personal touch without overshadowing the design.
- Short phrases: “Boo,” “Spooky,” “Eek,” “Trick or Treat,” or “Haunted” work well when space is limited.
- Year or date: Stamping the year of your event (e.g., “2025”) creates a collectible feel and helps guests remember the occasion.
- Custom names: Hosts often stamp their family name or the event name, such as “The Blackthorn Ball” or “Midnight Masquerade.”
When selecting words, consider the font style. Gothic script, serif capitals, and calligraphic flourishes pair beautifully with the black gold aesthetic. Avoid overly thin or intricate fonts that may lose detail in the wax impression.
Practical Applications for Black Gold Halloween Wax Seals
Now that you understand the appeal, let's explore how to use these seals in real-world settings. The possibilities go far beyond simple envelope closures.
Invitations and Correspondence
This is the most traditional use. Seal your Halloween party invitations with a black gold wax stamp to set the tone before guests even open the envelope. For a cohesive look, use matching black envelopes with gold liners or gold calligraphy for the address. The tactile experience of breaking a wax seal adds anticipation and delight.
Gift Wrapping and Party Favors
Wrap small gifts in black tissue paper or kraft paper, then secure the bundle with twine and a wax seal. For party favors, consider sealing the tops of treat bags or small boxes. A black gold seal transforms an ordinary favor into a keepsake your guests will want to display.
Table Settings and Place Cards
Use wax seals to hold place cards in place on napkins, or attach them to menus and programs. At a Halloween dinner party, a black gold seal on each place setting adds a level of detail that guests notice and appreciate. You can even stamp a number on each seal to indicate table assignments.
Decorations and Scrapbooking
Wax seals are not limited to paper goods. Adhere them to candle holders, glass jars, wooden signs, or photo frames. In scrapbooks, seals serve as dimensional embellishments that highlight special memories. For Halloween decor, consider sealing a small tag and hanging it from a doorknob or treat bowl.
Business and Branding
If you run a Halloween-themed business—a haunted attraction, costume shop, or seasonal bakery—using black gold wax seals on packaging, thank-you notes, or promotional materials can reinforce your brand's identity. The implied craftsmanship and attention to detail speak well of your products.
How to Create Your Own Black Gold Halloween Wax Seals
Making your own wax seals at home is surprisingly accessible. Here is a step-by-step overview for beginners:
- Gather supplies: You will need wax beads or sticks (choose black, gold, or a black-and-gold blend), a wax melting spoon or glue gun designed for wax, a stamp head with your chosen design, and a non-stick surface such as silicone mat or parchment paper.
- Melt the wax: If using a spoon, melt the wax beads over a heat source (candle or wax warmer) until fully liquid. If using a glue gun, load a wax stick and allow it to heat.
- Pour or press the wax: Drizzle a small puddle onto your non-stick surface. The size should match your stamp head. For a layered look, pour black wax first, then add a small amount of gold on top before stamping.
- Stamp immediately: While the wax is still warm and pliable, press your stamp firmly and evenly into the wax. Hold for a few seconds without wiggling.
- Let it cool: Allow the seal to harden completely—usually 30 seconds to a minute. Then gently peel it off the surface.
- Attach or store: Use a glue dot or hot glue to attach the seal to your envelope, gift, or decoration. Store extras in a cool, dry place.
For a true black gold effect, consider using wax that incorporates actual gold flecks or mica powder. You can also dust the stamp head lightly with gold pigment before pressing to create a metallic highlight on the raised areas.
Common Misunderstandings About Wax Seals
Many people assume that wax seals are fragile or difficult to use, but modern wax formulations have greatly improved durability. Here are a few clarifications:
- Myth: Wax seals break easily. While traditional sealing wax can be brittle, modern flexible wax blends are designed to withstand postal handling. If you are mailing invitations, use a flexible wax and place the envelope inside a protective sleeve.
- Myth: They require special skills. Creating a clean wax seal takes only a little practice. The most common mistake—stamping too late or too softly—is easy to correct after a couple of tries.
- Myth: You need expensive tools. Starter kits are affordable and include everything you need. As you advance, you can invest in custom stamp heads and premium wax blends.
- Myth: Only black wax works for Halloween. Black is a classic choice, but deep red, dark purple, or even metallic silver also suit the season. Black gold remains a favorite because of its versatility and elegance.
Black Gold Halloween Wax Seals in Modern Life
In an age of digital communication, physical mail and handmade details stand out more than ever. Using a black gold Halloween wax seal is a small but powerful way to slow down, create something tangible, and honor the tradition of thoughtful correspondence. It connects us to a time when messages were delivered with ceremony and care.
Beyond nostalgia, wax seals also serve a practical purpose in event organization. They can color-code invitations or place cards, act as a tamper-evident closure for favors, and provide a cohesive visual theme across all your materials. For educators and parents, making wax seals together can be a fun, hands-on activity that teaches history, design, and patience.
Tips for Storing and Caring for Wax Seals
To keep your black gold Halloween wax seals looking their best, store them in a container with a tight lid, away from direct sunlight and humidity. If the gold finish becomes dull over time, you can gently buff the raised areas with a soft cloth or reapply a tiny amount of gold wax with a detail brush. Always let seals cure for at least 24 hours before mailing or handling extensively.
Final Thoughts
Black gold Halloween wax seals are more than just decorative accents—they are a creative medium that blends history, artistry, and seasonal fun. Whether you are a seasoned crafter or a beginner looking to try something new, these seals offer a unique way to express yourself and elevate your Halloween celebrations. By choosing the right words, colors, and stamp design, you can create a lasting impression that your guests and recipients will remember long after the candles have burned out.
So this Halloween, consider adding a touch of black gold to your invitations, gifts, and decor. A single seal can turn an ordinary item into a treasured keepsake—and that is a tradition worth keeping.