Bachelorette Goose Shirt PNG: A Practical Guide to Integrating Digital Design Assets Into Real Event Workflows
Planning a bachelorette party involves coordinating personalities, timelines, and countless small decisions. One of those decisions is what the group wears. Coordinating shirts with a clever theme has become a staple of pre-wedding celebrations, and the Bachelorette Goose Shirt PNG has emerged as a versatile asset in this space. But beyond being a fun graphic, this digital file represents a specific category of design resource that fits into broader content workflows for event planners, small business owners, and DIY creators alike.
Understanding what a Bachelorette Goose Shirt PNG actually is, and how to use it effectively, requires looking beyond the surface-level novelty. This article walks through the practical application of such a design asset, from initial concept to final product, and explains how it interacts with other tools, platforms, and decisions you will face along the way.
What a Bachelorette Goose Shirt PNG Actually Is
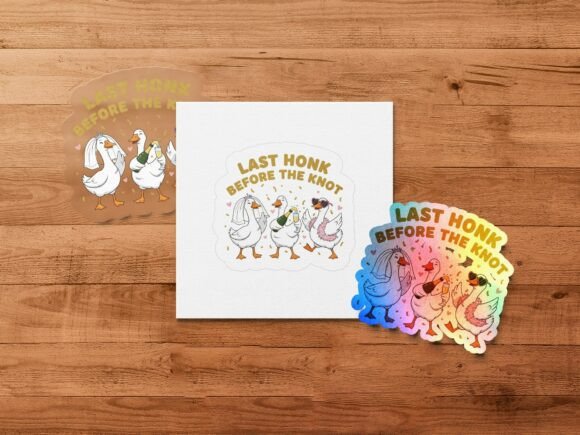
A PNG file is a raster image format that supports transparency. That transparency is what makes it particularly useful for shirt design. Unlike a JPEG, which fills the entire rectangular area with a solid background, a PNG allows the goose graphic to sit cleanly on any color fabric without a white box around it. The Bachelorette Goose Shirt PNG typically features a stylized goose wearing a bachelorette accessory—perhaps a veil, a sash, or sunglasses—combined with playful typography or a cheeky phrase.
At its core, this is a digital design asset. It is not a physical shirt. It is not a finished product. It is a component that you integrate into a larger production pipeline. Recognizing it as such changes how you approach sourcing, editing, and applying it. You are not buying a shirt; you are acquiring a graphic element that you will combine with other elements to produce a finished garment or printable item.
Where This Asset Fits in a Real Workflow
Whether you are a party host organizing outfits for ten friends, a small business owner selling custom bachelorette merchandise, or a graphic designer fulfilling a client brief, the process is similar. You begin with a concept, gather assets, assemble the design, choose a production method, and deliver the result. The Bachelorette Goose Shirt PNG enters the picture at the asset-gathering stage.
Consider these common scenarios:
- Event planning: You are the maid of honor. You want a unified look for the group. You find a goose PNG online, customize it with the bride's name or the date, and send the file to a print-on-demand service.
- Merchandise creation: You run an Etsy shop focused on bachelorette party goods. You purchase a commercial-use license for a goose PNG, integrate it into a shirt mockup template, and list the final design for sale.
- DIY crafting: You own a heat press or Cricut machine. You buy the PNG, upload it to your design software, adjust the size, and cut heat-transfer vinyl for a custom tee.
In each case, the PNG is not the end product. It is a raw material. The quality of your final output depends on how well you prepare and integrate that material into your specific workflow.
Before You Start: Preparation and Compatibility Checks
Rushing to use a design file without preparation is the most common mistake. Before you download or purchase a Bachelorette Goose Shirt PNG, take a few minutes to verify compatibility with your intended production method.
Resolution and Size
Shirt graphics need sufficient resolution to avoid pixelation at print size. A PNG that looks crisp on a phone screen might appear blurry when printed across the chest of a large t-shirt. Check the pixel dimensions. For a typical front-chest print, aim for at least 300 DPI at full scale. If the file is too small, scaling it up will degrade quality. Some sellers provide multiple size variants; if not, confirm the dimensions before buying.
Transparency and Background Edges
Not all PNGs have clean transparency. Examine the edges of the goose graphic against a dark background in your design software. Look for faint halos, jagged edges, or leftover white pixels. A poorly cut PNG creates noticeable artifacts when printed, especially on dark-colored shirts. If you encounter edge issues, you can manually clean them up using software like GIMP, Photoshop, or Affinity Photo, but that adds time to your workflow.
Color Mode
Screen displays use RGB. Most professional printing services require CMYK. If you are sending the file to a print shop, converting from RGB to CMYK can shift colors unexpectedly. The goose's bright white feathers might turn slightly gray, or the veil might lose its pastel tone. Test the conversion early. Some designers provide both RGB and CMYK versions of their PNG assets. If not, plan to adjust the color profile during your prep stage.
Licensing and Usage Rights
This is a practical consideration that many hobbyists overlook. A Bachelorette Goose Shirt PNG sold on a marketplace may come with restrictions. Personal use only. No commercial use. Limited to a certain number of products. If you plan to sell shirts featuring the design, you need a license that explicitly covers commercial production. Read the terms before purchasing. A small upfront investment in the right license saves legal headaches later.
During the Design Process: Integration With Other Tools
Once you have a clean, appropriately sized PNG, the next phase is integration. The goose graphic rarely stands alone. It typically combines with text, borders, or other decorative elements to form a complete shirt design.
Choosing the Right Software
Your choice of design tool depends on your skill level and the complexity of the layout. For simple text-plus-graphic combinations, Canva works well and requires no learning curve. You can upload the PNG, add a text layer, choose a font, and export a flattened design ready for printing. For more control over layers, alignment, and color adjustments, Adobe Illustrator or Affinity Designer give you vector-based flexibility even though the PNG itself is a raster file. If you use a cutting machine like a Cricut or Silhouette, their proprietary software accepts PNGs and allows you to set cut lines around the graphic.
Layering and Composition
Think of the goose as one layer in a stack. The shirt color is the bottom layer. The goose PNG sits above it. Text, additional graphics, or effects sit above that. When you export, the transparency ensures that only the goose and the text appear on the final design. This layering approach makes it easy to create variations. Swap the goose for a different animal. Change the text for a different bride. Keep the same layout and update only the elements that need to change.
Mockup Testing
Before you commit to production, test the design on a mockup. Place the goose PNG onto a t-shirt template in your software or use a dedicated mockup generator. This step reveals scale issues. The goose might be too large, making the design overwhelming, or too small, getting lost on the fabric. Mockups also let you evaluate contrast. A light-colored goose on a white shirt might lack visibility. A dark outline or shadow layer can solve that. Run a few mockups with different shirt colors and see which combination reads best from a distance.
Production Methods: Matching the Asset to the Process
The Bachelorette Goose Shirt PNG can be produced using several methods. Each method has specific requirements for file prep, and the PNG format behaves differently across them.
Direct-to-Garment (DTG) Printing
DTG printers work like inkjet printers on fabric. They accept PNG files directly. The transparency is honored, so only the goose and any added elements print onto the shirt. DTG is excellent for full-color designs and small batches. Prepare your file as a flattened PNG with a transparent background at 300 DPI. No additional separation is needed. This is the simplest path from PNG to finished shirt.
Screen Printing
Screen printing requires separating the design into individual color layers. A PNG with transparency is not directly usable on press. You must convert the goose graphic into color separations, usually one screen per color. If your design uses four colors, you need four screens. If you are outsourcing to a screen printer, they will ask for a vector file or a high-contrast PNG that they can separate themselves. Provide the cleanest version of the goose PNG you have, and confirm whether they prefer RGB or CMYK source files.
Heat Transfer Vinyl (HTV)
For DIY creators using a cutting machine, the PNG becomes a cutting guide. The machine reads the graphic and cuts around the shapes from a sheet of solid-color vinyl. The PNG itself is not printed; it is traced. This means you need a clean silhouette with no stray pixels. After cutting, you weed away the excess vinyl and press the remaining design onto the shirt using a heat press. The result is a single-color application. If you want a multicolor goose, you layer multiple vinyl sheets, which takes practice.
Sublimation
Sublimation works on polyester fabrics. You print the PNG onto sublimation paper using special ink, then heat press it onto the shirt. The ink turns to gas and bonds with the polyester fibers. Because sublimation relies on a full-bleed transfer, the transparent areas of the PNG will take on the shirt color naturally. This method preserves the full-color detail of the goose design, including gradients and small text. Make sure your shirt is at least 65% polyester for best results.
After Production: Quality Control and Long-Term Use
Your work does not end when the shirts arrive. Inspect each shirt against the original PNG file. Check alignment. Did the print shift? Are the colors accurate? Is the goose centered? If you are producing for a group order or a client, do this inspection before distribution. A misaligned print on a single shirt might be acceptable for a small party, but not for a paid order.
Store the original PNG file and any working files (layered design files, mockups, separations) in a well-organized folder structure. Name files clearly with the design name, date, and version. If the bride requests a change two weeks later, or if you want to reuse the goose concept for a future party, having organized assets saves hours of rework.
Consider building a small library of verified PNG assets that have already passed compatibility checks. If you work with bachelorette apparel regularly, keep a folder of pre-cleaned goose graphics, font files, and mockup templates. Each new project then begins from a position of readiness rather than from scratch.
Practical Observations for Long-Term Success
Integrating a Bachelorette Goose Shirt PNG into your workflow is not complicated, but it requires a systematic approach. The most successful users treat the asset as one component in a reproducible process. They verify resolution and licensing before purchase. They test compatibility with their chosen production method early. They mockup the design on multiple shirt colors. They document their steps so the next iteration is faster.
If you are a hobbyist, the key is patience. A rushed design often leads to a shirt that nobody wants to wear. Take the time to clean the PNG edges, adjust the color profile, and test the scale on a mockup. If you are a small business owner, focus on consistency. Use the same software, the same export settings, and the same quality checks for every product. Your customers will notice the reliability.
The goose itself is a flexible theme. It can be playful, elegant, or absurd depending on how you style it. The PNG format gives you the freedom to place that goose on any background without restriction. That freedom, combined with thoughtful preparation and a clear understanding of your production path, is what turns a simple digital graphic into a finished product that people actually enjoy wearing.
Whether you are printing one shirt for a friend or fifty for a client roster, the principles remain the same. Start with a quality file. Prepare it properly. Match it to the right production method. And keep your assets organized for future use. That is the difference between a one-time novelty and a repeatable, reliable part of your workflow.